Wednesday, 21 December 2011

SharePoint 2010 Search Set-up

In SharePoint 2007, if you created a new site collection using the ‘Collaboration Portal’ template, it would come with a number of sites, including the Search Center. In SharePoint 2010, this is no longer the case. There isn’t a Collaboration Portal template for starters, the nearest you’ll find is the Enterprise Wiki template which is my recommended starting point for Intranets, KM and Collaborative Sites. (Side note: Another example of poor usability on Microsoft’s part. The Enterprise Wiki template is available in both the Standard and Enterprise editions of SharePoint 2010. When you read about features with ‘Enterprise’ in the title, don’t assume they are limited to the Enterprise Edition, in most cases they are also available in Standard.)
In SharePoint 2010, the clue is in the search box:
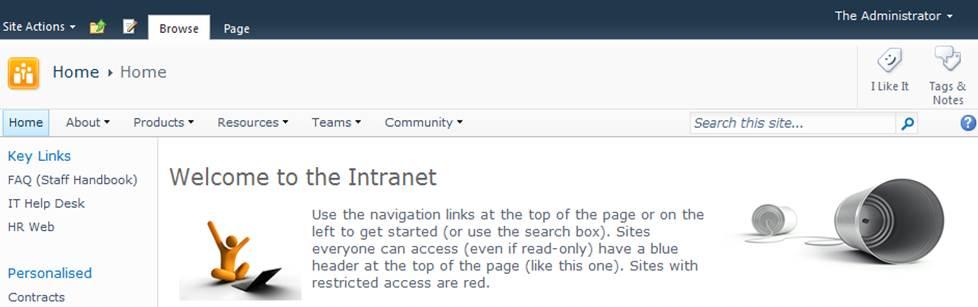
   

When you create a new site collection, the default search settings limit search to within the current site only and uses built-in search pages. If you want to search across multiple sites (a fairly normal requirement for most internal SharePoint deployments), use search scopes and configure different types of results pages, you will be wanting a dedicated search site. Here’s what to do:
Create a Search site
  1. At the root of the site collection where you want the Search site to live, click Site Actions and select ‘New Site’
  2. Select the search site template you want to use
  3. Enter a title and URL (Search works for me…) and create the site
There are up to three search site templates to choose from (and you should use a search template if you don’t want to create a lot of extra work for yourself setting up search query and results pages):
  • Basic Search – available with all versions of SharePoint
  • Enterprise Search – requires SharePoint 2010 Server: Standard or Enterprise edition (yes, another of those ‘Enterprise’ features also available in Standard)
  • FAST Search – requires SharePoint 2010 Server Enterprise Edition (or FAST add-on/dedicated)
The search query box is automatically integrated every SharePoint site within the global navigation bar (as shown in the first image above). Unless you particularly want to also have the Search site listed in navigation, go into the Navigation settings and hide it.
Configure Search Settings
Once you’ve got your search site, you can now configure the search settings to use it. This step needs to be repeated for each site collection that you want to point to the Search site.
  1. At the root of the site collection, go to Site Actions – Site Settings.
  2. Under Site Collection Administration, click on Search Settings
  3. Within Search Settings:
    • For the Site Collection Search Center, enter the URL to your search site in the format /search/Pages (replace the word ‘search’ with the site URL for your search site, if different))
    • In Site Collection Search Scopes dropdown mode, select ‘Show search scopes’
      The image below shows the settings for my demo machine:

  4. Click OK and you’re done.
Once the search settings are configured, the search box will show scopes with the default set to search across all sites instead of just the current site:

Don’t forget, you’ll need to configure search settings for each site collection that you want to point to the Search site. Whilst the URL will be relative for the site collection where the search site is located, for all other site collections you will need to enter the full path (for example, on my demo the URL is http://sp2010/search/ for all other site collections)
Enter a search query in the new search box and you will be routed to the Search site to display results:

In the image above, I’ve configured the default results page in the Search site to also include federated search results. When I enter the query ‘SharePoint’ I can see documents and items on the Intranet (along with refiners on the left to filter results), people who have SharePoint in their profile and federated results YouTube.
I’ve also modified my Search site to include 2 additional tabs – Staff Directory and Internet. The Staff Directory is discussed in a follow-up post (see links at the end of this page). The Internet tab shows more federated search results from sites such as Twitter, MSDN, TechNet and Google News. I’ve even got a page for querying Facebook but haven’t managed to federate that one yet. Federated results are great for finding relevant information inside and outside your organisation using a single query.

Tuesday, 22 November 2011

Using the SharePoint date control in a web part

Here is a code sample of a web part that uses the sharepoint date control
The code is simple - three controls - a DateTimeControl from the Microsoft.SharePoint.WebControls namespace, a button and a text box.The button has a click event. On click, the event sets the text box to display the date that was selected in the DateTimeControl.


public class DatePickerWebPart : System.Web.UI.WebControls.WebParts.WebPart
{
DateTimeControl dtc;
TextBox t;
Button b;

protected override void CreateChildControls()
{
base.CreateChildControls();
dtc = new DateTimeControl();
dtc.ID = "dtc" + this.UniqueID;
this.Controls.Add(dtc);
b = new Button();
b.Text = "Click me to see the date";
this.Controls.Add(b);
b.Click += new EventHandler(b_Click);
t = new TextBox();
this.Controls.Add(t);
}

void b_Click(object sender, EventArgs e)
{
t.Text = dtc.SelectedDate.ToLongDateString();
}
}


Here is the result.

This is the web part when the page first loads

 
This is the web part when you click on the date picker

This is the web part when you click on the button


Tuesday, 1 November 2011

Setting up Issue Tracking List

Tracking issues is a common task in companies. This may pertain to testing, product development, code promotion etc. SharePoint has a Issue Tracking list that can be used out of the box.
This article outlines the steps required to setup a Issue Tracking system.
·         Select Create from the ‘Site Actions’ menu
·         Select ‘Issue Tracking’ under ‘Tracking’ region (the Navigation may differ)
·         Enter a ‘Name’ and ‘Description’ for the list
·         Select ‘Yes’ to display in the Quick Launch region
·         Select ‘Yes’ to send e-mail notification. This is a good feature as the assignee of the issue gets e-mail notification
·         Click ‘Create’ button to complete
Add an Issue
You have a basic issue list with standard columns and views. Create additional columns and views as required (as explained later).
·         Click ‘New Item’ in the ‘New’ poplist to create a new issue item
·         Enter a ‘Title’ for the issue. For example, ‘Report’ fails with error
·         Select the employee or user to whom the issue is assigned to. If e-mail notification is enabled as explained earlier, this person would be notified of the issue creation and updates
·         Accept the default ‘Issue Status’ (normally ‘Active’ or ‘Open’)
·         Select the ‘Priority’ from the list
·         Enter a ‘Description’ for the Issue – this could be the nature of the issue and what caused it
·         Select a ‘Category’ from the list i.e. if you would like to track the issues by category
·         If there are ‘Related Issues’, select suitably
·         Enter a ‘Due Date’ i.e. the date by which the issue has to be resolved by
·         Click ‘OK’ to complete
·         To add a new item, follow the steps again
Adding Columns
You can add to these columns or delete irrelevant columns as required. For example, let us assume that an additional column is required to capture the ‘Environment’ the issue originated from. Steps are as follows:
·         Click Settings > List Settings
·         Click ‘Create Column’ under ‘Columns’ region – One can also ‘Add from existing columns’
·         Enter ‘Column Name’
·         Select a suitable information type for the column – In this example, ‘Choice’ is checked as we intent to select the appropriate environment from the choices given
·         Complete ‘Display Choices’, ‘Default Value’ sections
·         Click ‘OK’
Views
Apart from the default views, additional views can be created as well. There is no threaded or flat views in an issue list.
Printing Feature
The Issue Tracking list lacks a print view as well. However, the flexibility to export to spreadsheet and print is available; however, this involves additional formatting.
Status View
It is possible to report on Open, Closed, or Resolved items in the Issue Tracking list. This is an important requirement as one would like to know what issue are still outstanding at any time. Create a view named ‘open’ or ‘closed’ and apply suitable ‘filter’ criteria to accomplish this.

Monday, 31 October 2011

Hide form fields in SharePoint (Issue Tracking List)

Sometimes when building SharePoint solutions or creating custom lists you want to hide some columns from the new or edit form. But the default new and edit form are automatically generating the form fields with all the columns that are created for the list.
This can be done in three different ways. The first way to do this is to use SharePoint Designer and make a custom form field, there are a couple of good articles about this (but you should be aware of that this could in some cases cause problems with e.g. attachments not working properly without extra coding). The second way, and the easiest way, is with content type as I will guide you through today. This might on the other hand be the least flexible. The last way is by using PowerShell which I will get back to later in the article.
Start by going to your list that you want to modifye the form fields on, this could be any kind of list or library. In the list go to List Settings and then click on the Advanced List settings.
What you first need to do is to allow management of Content Types. Click on Yes and then Ok.
You will then return back to the List Settings page which now looks a bit different. You will see a new section called Content Type. In my example I have used an Issue list so what I have is the Content Type Issue like shown in the picture below. 

What you see now is a list of all the Site Columns that is connected to the Content Type Issue. This could have been any kind of Content Type, default or custom made that has default or custom made Site Columns.
By clicking on any of the columns you are able to do some modifications to the column. In the Column Settings section you have three options. Required, Optional and Hidden. By Selecting Hidden the form field will not show up in forms. You should however note that this makes the form field hidden both in the NewForm.aspx and the EditForm.aspx forms.

Monday, 10 October 2011

(Service Unavailable) Could not load all ISAPI filters for site/service. Therefore startup aborted.

Hi,
After running the Sharepoint products and technologies configuration wizard successfully, the central administration site page opens up.
( We were installing MOSS 2007 on 64 bit machine)
But in my case it was giving the following error
“Service Unavailable”
Checking into event log gave the following information
<!--[if gte mso 9]> Normal 0 false false false EN-US X-NONE X-NONE MicrosoftInternetExplorer4 <![endif]--><!--[if gte mso 9]> <![endif]--> <!--[endif]-->Could not load all ISAPI filters for site/service. Therefore startup aborted.
and
<!--[if gte mso 9]> Normal 0 false false false EN-US X-NONE X-NONE MicrosoftInternetExplorer4 <![endif]--><!--[if gte mso 9]> <![endif]--> <!--[endif]-->
ISAPI Filter ‘C:\WINDOWS\Microsoft.NET\Framework\v2.0.50727\aspnet_filter.dll’ could not be loaded due to a configuration problem. The current configuration only supports loading images built for a AMD64 processor architecture. The data field contains the error number. To learn more about this issue, including how to troubleshooting this kind of processor architecture mismatch error, see http://go.microsoft.com/fwlink/?LinkId=29349.
Searching for it the solution that I found was the following
// Disabling the 32bit mode for your web site.
cscript C:\inetpub\adminscripts\adsutil.vbs SET W3SVC/AppPools/Enable32bitAppOnWin64 0
and then the following
// Registering ASP.NET 2.0 as the default framework for that web site
C:\Windows\Microsoft.NET\Framework64\v2.0.50727>
aspnet_regiis.exe -i
This resolved the issue for me!!

Friday, 7 October 2011

SharePoint 2007 colour (color) calendar

The in-built calendar view is SharePoint 2007 is a heck of a lot better than the one in 2003 but it still lacks a feature requested by many customers - the ability to colour (or color for our US friends) code the entries like you can in Outlook.

In SharePoint 2003 the calendar was rendered entirely using Javascript so it was a question of modifying the schema.xml file for the list to output the relevant parameters and then overiding an ows.js function to ensure the colours got rendered. However in 2007 the calendar view is generated from code, specifically a bunch if classes like SPListView, SPCalendarView etc. Lots of this class heirarchy is marked as sealed or internal so it is not easy to try to inherit and change the behaviour. Plus lots of the code is obfuscated too.

First of all I created a standard SharePoint Calendar list. Then I added a Choice column called Category and put the following values in the choice field.

Appointment
Birthday
Business
Important
Vacation


Secondly I created a calculated column called CatTitle set to the following formula as seen in the image,

=Category & "|||" & Title

You could make these site columns if you wish to re-use elsewhere.


Finally change the calendar view on the list so that the display field for each of day/week/month view is the CatTitle field.


Now we need to insert some javascript to edit the titles so that they category and pipes are removed and the entries are coloured in. Edit the calendar page (Site Actions -> Edit Page) and insert a content editor web part UNDER the calendar list view. Paste the following javasript into the source view. Make the web part hidden.

 <script>  
 var SEPARATOR = "|||";  
 var nodes, category;  
 nodes = document.getElementsByTagName("a");  
 function getObjInnerText (obj)  
 {  
   return (obj.innerText) ? obj.innerText : (obj.textContent) ? obj.textContent : "";  
 }   
 for(var i = 0; i < nodes.length; i++)  
 {  
   if(getObjInnerText(nodes[i]).indexOf(SEPARATOR) != -1)  
   {  
     UpdateCalendarEntryText(nodes[i]);  
     var foundNode = nodes[i];  
     var trap = 0;  
     while(foundNode.nodeName.toLowerCase() != "td")  
     {  
       foundNode = foundNode.parentNode;  
       trap++;  
       if(trap > 10)  
       {  
         break; // don't want to end up in a loop  
       }  
     }  
     var colourinfo = GetCalendarColourInfo(category);  
     if(colourinfo.bg != "")  
     {  
       foundNode.style.background = colourinfo.bg;  
     }  
     // try and update the text colour if we can TD/A/NOBR/B/#text  
     if(colourinfo.fg != "")  
     {  
       try  
       {  
         // there should only be one anchor tag  
         childNodes = foundNode.all;  
         for(var j = 0; j < childNodes.length; j++)  
         {  
           if(childNodes[j].nodeName.toLowerCase() == "a")  
           {  
             // found anchor tag  
             childNodes[j].style.color = colourinfo.fg;  
             // set the NOBR tag as well to set the time if it is shown, but set it on the B tag for month view  
             if(childNodes[j].children[0].nodeName.toLowerCase() == "nobr")  
             {  // month view has an extra b tag surrounding the text  
               childNodes[j].children[0].style.color = colourinfo.fg;  
               if(childNodes[j].children[0].children[0].nodeName.toLowerCase() == "b")  
               {  
                 childNodes[j].children[0].children[0].style.color = colourinfo.fg;  
               }  
             }  
             break;  
           }  
         }  
       }  
       catch(e) {}  
     }  
   }  
 }  
 function ColourInfo(bg, fg)  
 {  
   this.bg = bg;  
   this.fg = fg;  
 }  
 function UpdateCalendarEntryText(anchorNode)  
 {  
   var children = anchorNode.childNodes;  
   for(var i = 0; i < children.length; i++)  
   {  
     if(children[i].nodeType == 3 && children[i].nodeValue.indexOf(SEPARATOR) != -1)  
     {  
       var parts = children[i].nodeValue.split(SEPARATOR);  
       category = parts[0];  
       children[i].nodeValue = parts[1];      
     }  
     else  
       UpdateCalendarEntryText(children[i]);  
   }  
 }  
 function GetCalendarColourInfo(desc)  
 {  
   var colour = new ColourInfo("", "");  
   var trimmed = desc.replace(/^\s+|\s+$/g, '') ;  
   switch(trimmed.toLowerCase())  
   {  
     case "appointment":  
           colour.bg = "#ffd266";  
           colour.fg = "";  
           break;  
           case "birthday":  
           colour.bg = "#ae99dc";  
           colour.fg = "";  
           break;  
           case "business":  
           colour.bg = "#8aabe0";  
           colour.fg = "";  
           break;  
           case "important":  
           colour.bg = "#e77379";  
           colour.fg = "";  
           break;  
           case "vacation":  
           colour.bg = "#fffa91";  
           colour.fg = "";  
           break;  
     default:  
     {  
       colour.bg = "";  
       colour.fg = "";  
     }  
   }  
   return colour;  
 }  
 </script>  


You should now have a coloured calendar! Month, week and day views should appear coloured. Remember that if you place a calendar web part on a site that you will need a hidden content editor web part containing the javascript as well.


If you want to change the categories and colours, then simply add or change entries in the choice column and change the function in the Javascript accordingly.

In an ideal world this would be some sort of deployable feature, perhaps custom list definition. I will have a look at doing this at some point if I get time....

Friday, 30 September 2011

SHAREPOINT 2007: INTEGRATING THE GOOGLE CHART API IN SHAREPOINT LIST

INTRODUCTION
In this article, I’ll show you how to use Google Chart API in SharePoint 2007 (MOSS):
     1. Create a Custom List in SharePoint Server 2007
     2. Create a Web Part page (used to display graphical representation of the list data)
     3. Integrate Google Chart API into SharePoint
CREATE A CUSTOM LIST IN MOSS 2007

Follow the steps below in order to create a new custom list.

1. Click Site Actions > Create.

2. Under Custom Lists, select Custom List.


3. Fill in Name and Description.


For this demonstration, name the list Projects.

4. Click Create.
    The Projects custom list is created.


5. Click Settings > Create Column.

    Enter the name of the new column, select the data type, and details for each column you create.

    For this demonstration, I created three new columns in Projects:

       • Start Date(Date)
       • End Date (Date)
       • Status (Choice list: Complete, Deferred, In Progress, Not Started)

6. Fill this list with sample data to create the Google Chart.

    To create sample data, click New.


7. Fill the New Item form, and click OK.


8. Repeat until you have enough data to demonstrate your Google Chart API.

    For this example, I created 10 items.


CREATE A WEB PART PAGE

Use the web part page used to display graphical representation of the list data:

1. Click Site Actions > Create.


2. Under the Web Pages section, select Web Part Page.


3. Fill the required information for the New Web Part Page:

    • Name: SamplePage
    • Accept defaults

4. Click Create.


The new Sample Page is created as below.


INTEGRATE GOOGLE CHART API INTO SHAREPOINT

To display the graphical representation of any list data, we first need to decide which column of the list we want to use as a graph criteria. Then we need to create a “grouped by” list view on that column. For chart to be displayed, the “grouped by” list view must be on the same page.

I use Status as the criteria for the graph. We first need to add the Projects list web part on the Sample Page to display Projects list “group by” Status column.

1. Click Add a Web Part in any of the zone of the page.

2. Under the Lists and Libraries section, select the Projects list (or the name of your list).


3. Click Add.

    We need to edit this list to create a new view grouped by the Status column.

4. Click Edit > Modify Shared Web Part.


5. Click Edit the current view link.


6. Scroll to the bottom of the page, and click to expand Group By section.


7. For First group by the column: select the Status column.

8. Select your preference for Ascending or Descending order.
9. Click OK.

    The newly created list view will be added on the Sample Page.


Now to add graph for the list view, we need to add another web part on the Sample Page: Content Editor Web Part

10. Click Site Actions > Edit Page.


11. Click Add a Web Part above the Project list view just added.

12. Under the Miscellaneous section, select Content Editor Web Part.


13. click Add.

14. Select Edit > Modify Shared Web Part.


15. Open the Source Editor (right side).


16. Copy the following code and paste into the Text Entry dialog box:
<div id="jLoadMe" class="content"><strong>Pie Chart Example Using Google Charting API</strong></div>
<script type="text/javascript">if(typeof jQuery=="undefined"){
 var jQPath="http://ajax.googleapis.com/ajax/libs/jquery/1.3.2/";
 document.write("<script src='",jQPath,"jquery.js' type='text/javascript'><\/script>");}
</script>
<script type="text/javascript">
$("document").ready(function(){
 var arrayList=$("td.ms-gb:contains(':')");
 var coord= new Array();
 var labels= new Array();
 $.each(arrayList, function(i,e) {
  var MyIf= $(e).text();
  var txt= MyIf.substring(MyIf.indexOf('(')+1,MyIf.length-1); // Extract the 'Y' coordinates
  coord[i]=txt;
  var txt1= MyIf.substring(MyIf.indexOf(':')+2,MyIf.indexOf("(")-1); // Extract the labels
  labels[i]=txt1+"("+txt+")";   //add also coordinates for better read
 });
 var txt= coord.join(",");
 var txt1= labels.join("|");
 // Adjust Chart Properties below - See Google Charts API for reference
 var vinc= "<IMG src='http://chart.apis.google.com/chart?cht=p3&chs=750x200&chd=t:"+txt+"&chl="+txt1+"'/>";
 $("#jLoadMe").append("<p>"+vinc+"</p>")
});</script>


17. Click Save.
      You will see that the graph has been added into the web part.


18. Click OK. If you see the Security Warning box as below, click No.


19. Click Exit Edit Mode.